Why not just follow the manufacturer’s guide, if only! Filament specifications are a good starting point, if you 3D print you will know that it is a process full of variables. There are a million factors; such as the printer used, the characteristics of the filament, and even the conditions of the printing environment can significantly alter the results.
Performing calibration tests, such as the temperature tower, is not only recommended, but necessary in the following cases:
When changing printers.
When changing filament, even within the same PLA category.
If a filament with a different texture or finish is used, (even if it is of the same brand) such as Figutech ONE’s matte or glossy PLA.
When printing in a different environment, where temperature or air currents can influence the behavior of the material. This includes seasonal changes, it is not the same to print in winter in a room at 6 degrees Celsius than to print in summer in a room at 30 degrees Celsius.
Why Calibrate Temperature in PLA 3D Printing?
Temperature calibration is not a luxury or an optional step; it is an essential component if you want quality results when printing with PLA. If you have ever noticed poorly adhering layers, uneven surfaces or brittle parts, the problem is likely to be an improperly set temperature, although there are many other settings, this should be the first one you try.
Below, we delve into why this setting is crucial and how it can transform your impressions.
The critical role of temperature in PLA
PLA, known for its ease of use, responds directly to temperature variations during printing. Each filament has a temperature range recommended by the manufacturer, but in practice, these numbers can vary due to multiple factors: from the specifications of your printer to the environment where you are printing.
When the temperature is not adequate:
If it is too low, the filament does not melt completely, causing underextrusion, incomplete layers and brittle parts.
If it is too high, the material becomes excessively fluid, generating defects such as threads, bubbles and rough surfaces.
In addition, an incorrect temperature directly affects the adhesion between layers, compromising the strength and durability of the final part.
You can control these aspects with precise calibration, ensuring that the filament flows evenly and that each layer adheres perfectly to the previous one.
Impact on the visual and structural qualityof your 3D prints
Print temperature affects not only how your parts look, but also their functionality. If you are looking for flawless finishes, proper calibration is a must. For example:
Matte finishes: To obtain gloss-free surfaces with a soft touch, it is important to avoid overheating that can create imperfections.
Glossy finishes: More sensitive to temperature changes, as overheating can dull the surface.
At the structural level, an adequate temperature strengthens the adhesion between layers, making the parts more resistant. This is especially relevant if you print functional parts that will be subjected to mechanical stress.
Don’t know if you need to do a temperature tower? How to identify temperature problems in your prints
Next time you print, take a close look at the following aspects to identify possible temperature adjustments:
Surface: Look for signs such as streaks, roughness or dull areas where the filament did not flow properly.
Layers: Check if the layers are well adhered; any separation may indicate a low temperature. If you want to take the step to be a “PRO” of 3D printing, we recommend that you read this article we have created for you to understand 100% the warping and know how to solve it.
Structure: Evaluates the strength of the final part. If it breaks easily, it may be a sign of incorrect temperature during printing.
Once you recognize these problems, you can take specific steps to solve them, such as adjusting the temperature slightly in 5 °C increments until you find the optimum point.
Temperature calibration is a process that, although time-consuming and time-consuming, ensures that every print meets your expectations. Now that you understand its importance, let’s move on to explore the main tool of this article, which facilitates this adjustment: the temperature tower.
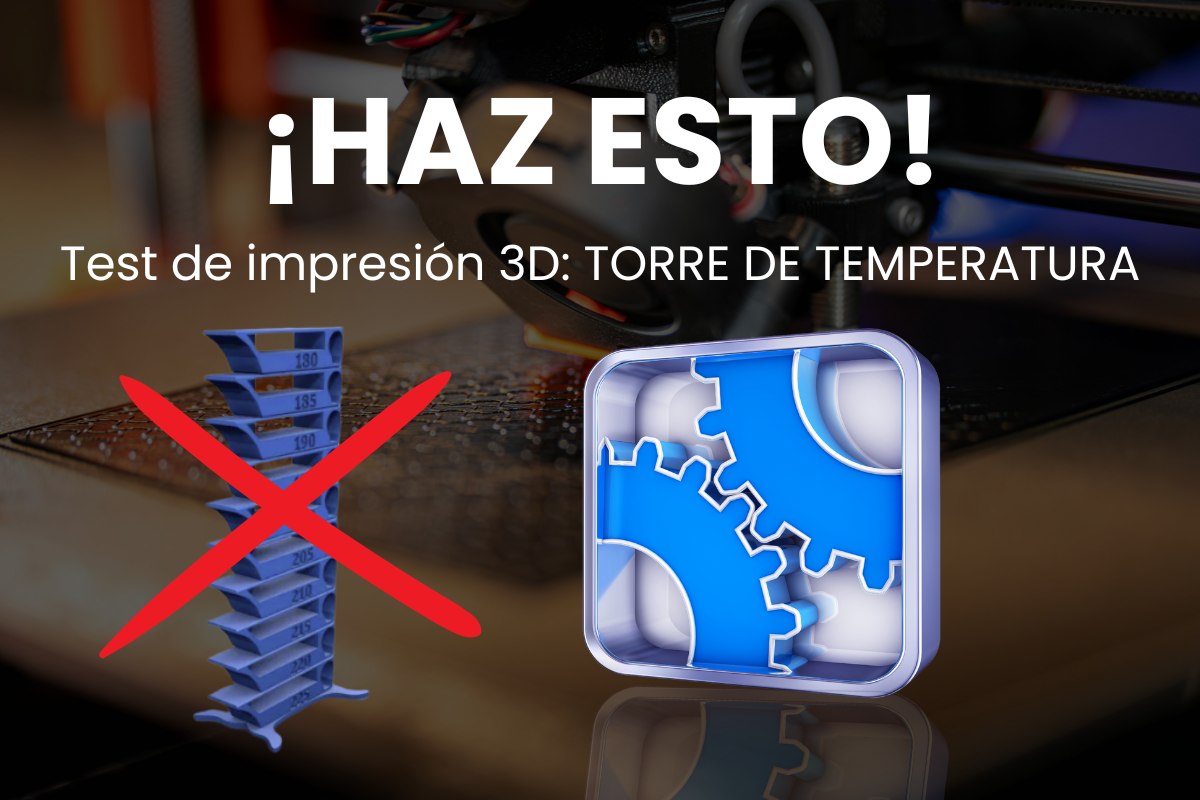
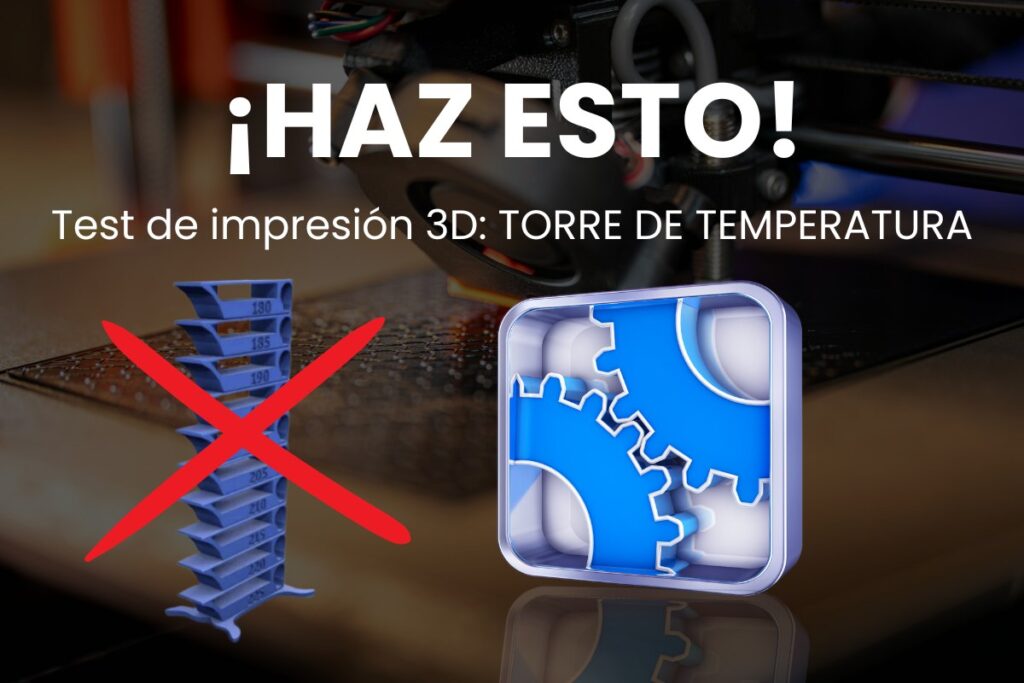
What is a Temperature Tower and Why Use it with PLA?
The temperature tower is one of the most effective tools for finding the ideal temperature setting for your PLA filament. It is a specially designed model that is printed by varying the temperature in different sections. This process allows you to visually and structurally identify which is the best temperature to achieve an optimal finish and good adhesion between layers.
How does a temperature tower work?
The tower model is designed with sections that are printed at specific temperatures, for example, starting at 220 °C and gradually decreasing in 5 °C intervals down to 190 °C. By analyzing the finished part, you can observe how the behavior of the filament changes in each temperature range. This includes:
Intercoat adhesion: If the coats are not well fused in one section, the temperature is probably too low.
Quality of finish: Rough or threaded surfaces usually indicate excessive heat.
Fine details: Sharper, cleaner areas signal that the filament is at its optimum.
This approach allows you to easily identify the temperature that offers the best balance between visual quality and structural strength.
Benefits and Limitations of Using a PLA Temperature Tower
Category
Detail
Benefits
Customized adjustment
It allows to identify the ideal temperature range for each filament, even if it is of the same brand.
Consistent results
Helps maintain print quality in all projects once the optimal settings have been found.
Rapid diagnosis
Quickly identifies temperature-related problems such as weak coatings or defective surfaces.
Limitations
Non-visible variations
Some structural problems are not obvious and require additional testing such as strength testing.
Other influencing factors
Factors such as flow, speed and cooling also affect printing, not just temperature.
Differences between printers
A configuration that works on one printer may not be effective on another, even using the same filament.
How to Configure a PLA Temperature Tower in Orca Slicer
Initial Setup: Configuring your 3D Printer and Filament in Orca Slicer
Select a base profile for PLA in Orca Slicer
Open Orca Slicer and choose a PLA profile compatible with your printer. If you use premium filaments such as Figutech ONE, verify that the initial settings are according to the recommended range (e.g. between 190 °C and 220 °C).
Check the filament diameter, usually 1.75 mm, and make sure it matches your configuration.
Adjusts the bed temperature
Set the bed to a suitable temperature (50 °C to 60 °C for most PLA). If you are working in a cold environment or with special filaments, such as a matte PLA, consider specific settings to improve adhesion.
Printer leveling and calibration
A level bed and a properly calibrated extruder are essential for error-free printing of the temperature tower. Be sure to perform this task before proceeding.
Configure flow and cooling
Uses a standard flow rate (100%) as a starting point.
100% cooling is ideal for PLA, except for the first few layers, where a lower percentage improves adhesion to the bed.
How to Create an Automatic Temperature Tower in Orca Slicer
Download a pre-configured G-code file (Ideal if you are doing this test for the first time).
Look for a specific G-code file for PLA temperature towers. These files already come with temperature ranges set in regular increments, eliminating the need to manually adjust in software. Platforms such as Printables or GitHub often have free options optimized for Orca Slicer.
Load the file in Orca Slicer
Import the G-code directly into Orca Slicer to preview the model. Although you cannot modify the file, you can make sure it is compatible with your printer and filament.
Configure manually with STL if you prefer to customize it (recommended for more experienced users).
If you want more control, download a temperature tower STL file.
Use the “Modify by height” function in Orca Slicer to set different temperatures per layer. For example, define 5 °C increments from 220 °C at the bottom to 190 °C at the top.
Preview temperature settings
Before printing, use the preview in Orca Slicer to verify that the temperature settings were correctly applied to each section of the tower.
How to Analyze Temperature Tower Results
Printing a temperature tower is only the first step; it is the detailed analysis of the results that will allow you to choose the optimal temperature for printing PLA. This point breaks down the most important aspects to evaluate and how to make decisions based on the results obtained.
What to Watch in the Temperature Towers
Analyzing a temperature tower involves reviewing several key characteristics. Here’s what to look for in each tower segment:
Interlayer adhesion:
Check if the layers are well bonded by applying light pressure. If the layers separate easily, the temperature is too low.
Higher temperatures tend to improve intercoat adhesion, but may cause other problems such as warping or excessive stringing.
Stringing (Unwanted Threads):
Observe the areas of the tower where the filament forms small threads between unconnected points.
Stringing is usually more evident at higher temperatures, as the filament remains more fluid.
Bridges and Overhangs:
Analyze how the bridges (unsupported horizontal sections) behave at each temperature level.
Look for areas of sagging or imperfections in the overhangs to identify temperatures that cause warping.
Surface finish:
Evaluates the finish of each level:
Matte: Lower temperatures tend to generate more opaque finishes.
Glossy: Higher temperatures produce smoother and glossier finishes.
Decide which finish you prefer according to the purpose of your print.
Fine details:
Check the definition of edges and small details. If the edges are blurred or distorted, the temperature may be too high.
Warping:
Observe if the bottom layers are lifting or if the base of the tower is deformed. This can occur when the temperature is too high or when the hot bed is not properly configured.
How to Choose the Ideal Temperature
Selecting the ideal temperature requires balancing several factors. Here we explain how to do it step by step:
Identifies the Useful Range:
Most temperature towers show a temperature range where PLA behaves correctly.
For example, for standard PLA, the usable range is usually between 200°C and 220°C.
Prioritize According to End Use:
Functional Prints: If you need maximum strength, choose the highest temperature within the useful range (without compromising the finish).
Aesthetic Impressions: If you are looking for a perfect visual finish, prioritize the level with the least stringing and the desired surface finish.
Common Commitments:
You will probably not find a temperature that is perfect in every respect.
For example, a temperature with less stringing may have slightly lower adhesion. Decide which factor is more important for your project.
Confirm with a Second Test:
Once the ideal temperature has been selected, make a simple print (such as a Benchy or calibration cube) to verify that the settings work on a more complex model.
Solutions to Frequent Problems in Temperature Towers
If the results of the tower are not clear or if problems arise during the analysis, here are some solutions:
Excessive Stringing at All Temperatures:
Check the filament for moisture; this can cause bubbles and stringing.
Adjust the retraction settings to reduce stringing in the slicer.
Sunken or Deformed Bridges:
Make sure the cooling fan is running at 100% after the first coat.
If you use high temperatures, increase the fan speed gradually.
Poor adhesion in all layers:
Confirm that the temperature of the hot bed is suitable (50°C-60°C for PLA).
Increases the nozzle temperature by 5°C and prints a new tower.
Inconsistent Results:
Check if the actual hotend temperatures match those set in the slicer.
Clean the hotend, as residues from previous filaments can alter the results.
Update your material profile in Orca Slicer
After identifying the ideal temperature, customize your filament profile in Orca Slicer to ensure that all your future prints take advantage of this setting. Configure:
Extruder temperature in the optimum range (e.g. 205 °C).
Bed temperature according to the environment (50 °C to 60 °C for standard PLA).
Printing speeds and air flow according to observed behavior.
These settings will allow you to obtain consistent, high quality results in all your projects.
Additional Tips for PLA and PLA+
PLA and PLA+ are two of the most common materials in 3D printing due to their ease of use, low cost and versatility. However, there are several aspects you should keep in mind when working with these materials to ensure optimal results. Here is a complete guide to maximize the quality of your prints:
Temperature Settings According to Filament Color
Filament color can significantly affect print results due to the additives used in its manufacture. Some recommendations are explained here:
Black and white:
Black contains more carbon pigments, which makes uniform heating difficult and may require higher temperatures (+5°C to +10°C).
White, which uses titanium dioxide as pigment, also needs slightly higher temperatures to avoid inconsistencies.
Translucent and Metallic Colors:
These are usually best printed at lower temperatures to avoid burning or color alteration.
Standard colors (red, blue, gray):
They tend to have a more predictable behavior, operating within the typical 200°C to 215°C range.
Tip: If you are working with dark or light colors, try a specific temperature tower to confirm the necessary settings.
Settings for PLA+ (Enhanced)
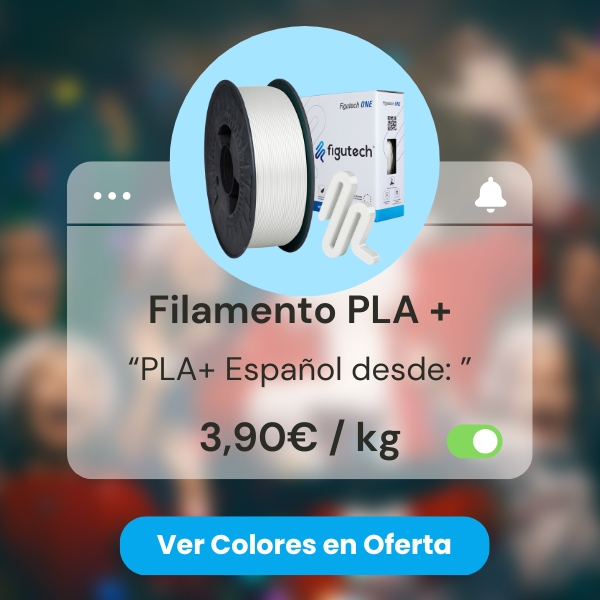
PLA+ is modified to offer greater strength and flexibility, but this also makes it a bit more demanding in configuration. Our Figutech ONE PLA filament is the easiest PLA+ filament to print with .
Some recommended settings for PLA+:
Recommended temperature:
Generally, PLA+ requires higher extrusion temperatures, between 210°C and 230°C.
Adhesion to the bed:
Use a hot bed at 60°C-70°C to improve initial adhesion. An adhesive such as glue or tape may be useful on glass.
Retractions:
You may need to adjust the shrinkage to avoid stringing, which can be more frequent with PLA+.
Note: Always check the manufacturer’s specifications, as PLA+ varies widely among brands.
Speed and Cooling Settings
Printing speed and cooling are two very important factors to ensure the best results with PLA and PLA+.
Printing speed:
Low speed (40-60 mm/s): Ideal for fine details and minimizing imperfections.
High Speed (80-120 mm/s): Can be used with PLA+ filaments if the temperature is properly adjusted (+5°C).
Refrigeration:
For standard PLA, use the fan at 100% after the first layer.
For PLA+, start with the fan at 30%-70% to improve intercoat adhesion and gradually increase.
Advanced Tip: If you are working with high speed printers or complex models, we recommend performing specific tests such as a Calibration Cube to adjust the flow and cooling.
Filament Maintenance and Storage
PLA is hygroscopic, which means that it absorbs moisture from the environment, negatively affecting print quality.
Adequate Storage:
Store the PLA rolls in airtight bags with desiccants, just as we sent them to you from Figutech.
Avoid exposing the filament to direct sunlight or humid environments.
Filament Drying:
If you notice excessive stringing or bubbles in the prints, dry the PLA in a filament oven at 40°C-50°C for 4-6 hours.
Tip: A dry filament improves interlayer adhesion and reduces visual defects.
When to Adjust Beyond the Standard Range
There are situations where the typical 200°C-220°C range for PLA will not be sufficient:
High Speed Printers (Input Shaper):
Increase the temperature to 225°C-230°C to ensure that the filament flows properly and the layers adhere.
Complex bridges and cantilevers:
If the model has many overhangs, use lower temperatures (190°C-200°C) together with maximum cooling.
Important: Adjust gradually and test each change with a test model such as a Benchy or a temperature tower to avoid material waste.
Summary of PLA and PLA+ Tips
Adjusts the temperature according to the color of the filament.
Increases the temperature for PLA+ and fast setups.
Keep the filament dry and store it properly.
Adjusts speed and cooling to achieve an optimal balance between quality and speed.
Frequently Asked Questions About PLA Temperature Calibration
What is the typical temperature range for PLA?
PLA generally prints in the 190 °C to 220 °C range, although this may vary slightly depending on the manufacturer and filament characteristics (matte, glossy, with additives, etc.). Check the product specifications and use a temperature tower to fine tune the setting.
Is it possible to print outside the temperature range stipulated by the manufacturer?
Yes, you can, and even should, as long as you have done the necessary tests. Manufacturers always recommend a temperature range based on extensive testing with standard equipment, but this does not mean that it is a fixed rule for all cases.
How do I know if my printer is under-extruding at low temperature?
Underextrusion usually manifests as:
Incomplete or fragile layers.
Visible gaps between extrusion lines.
Unevenly textured surfaces. If you detect these problems in the lower temperature sections of your temperature tower, it is a clear sign that the filament is not melting properly.
What is the best design or temperature tower file?
To find the ideal design, simply search for “temperature tower [your printer]” on platforms such as MakerWorld or Thingiverse. Some models already come preconfigured as G-code files with the temperature settings ready to print, saving you time and effort.
Is it enough to use the temperature tower or do I need more tests?
The temperature tower is an excellent starting point for setting the extruder temperature. However, for a complete calibration, figutech always recommends additional tests, such as calibration cubes, shrinkage tests and structural strength tests. This ensures that all your printer settings are optimized.
Also, if you don’t test anymore and have failed prints, you shouldn’t have the right to “blame” the printer or the filament you are using😜.
How do environmental conditions influence PLA printing?
The environment plays an important role. Factors such as room temperature, humidity and air currents can affect the way the filament cools and therefore directly affect interlayer adhesion and surface finish. If you notice inconsistencies in your prints, check the conditions of where you are printing and consider retesting in a more controlled environment.
We promise to send you only what interests you: practical advice, special discounts and access to free samples of our filaments. No spam, only benefits.
Categories
About Daniel Feyto
Soy un apasionado de la tecnología de impresión 3D con más de 4 años de experiencia. Comparto conocimientos y avances para ayudar a entusiastas y profesionales a aprovechar las oportunidades del sector.