3D
Smooth Surfaces in 3D Printing | Seams Ironing
Surface quality is the first impression of a 3D part. In Bambu Studio you can gain “professional face” with two
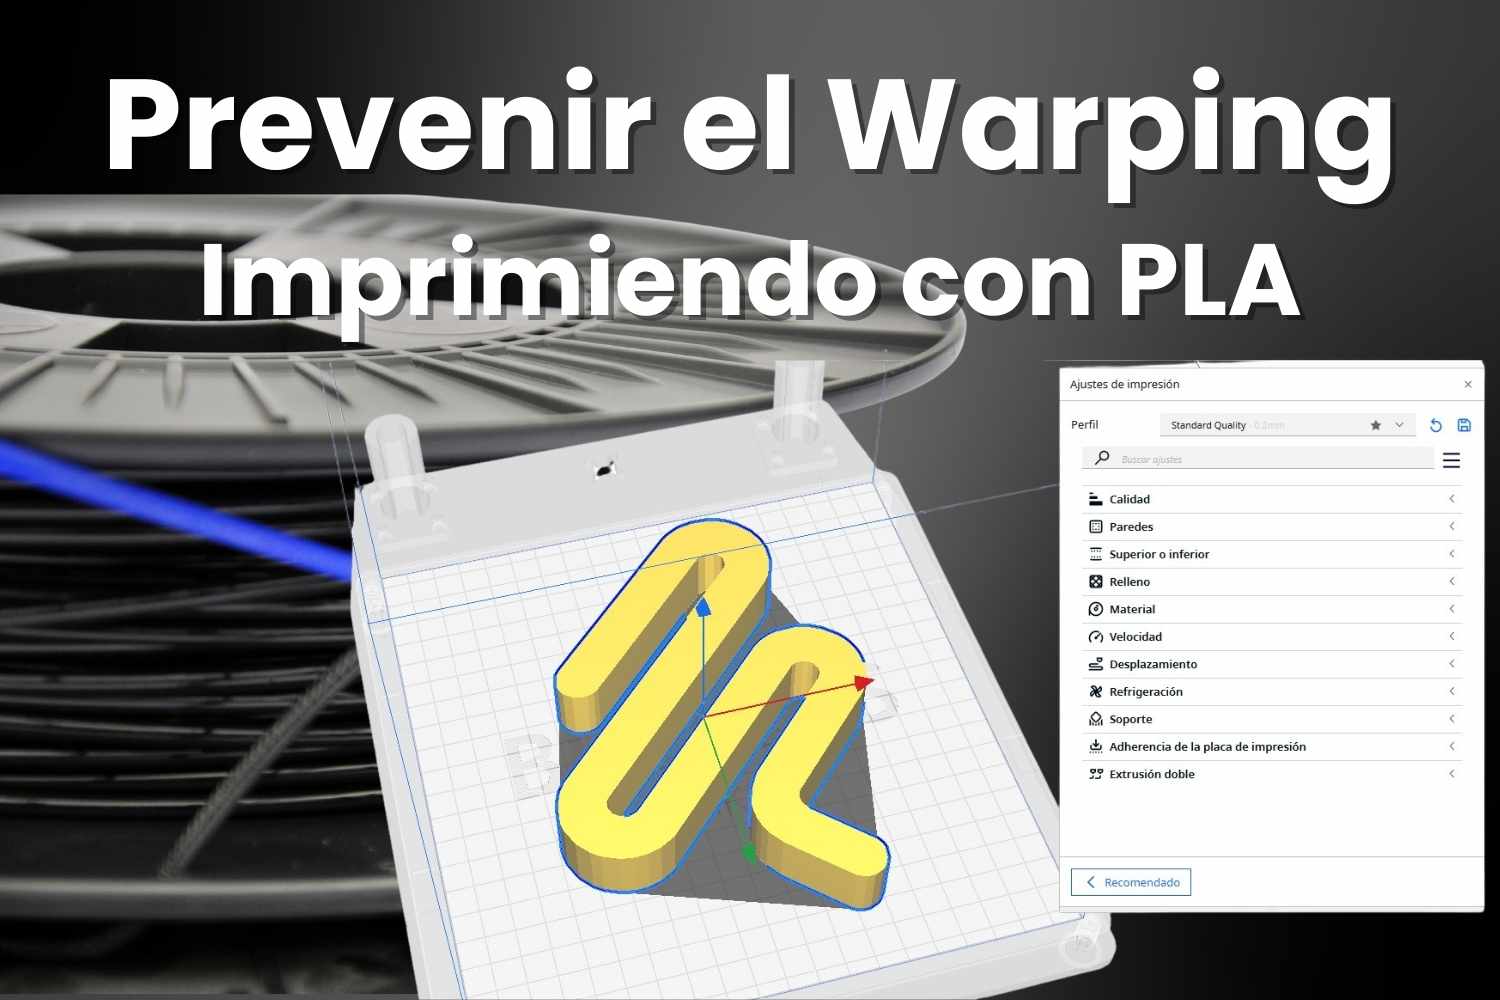
If you’ve been 3D printing for some time, you’ve surely encountered the famous“warping” problem. Although usually associated with ABS, PLA also exhibits warping if not printed under the right conditions. The good news is that, contrary to what many people think, warping is not an inevitable fate. In reality, the problem lies more in how we set up the printer and in some details of the printing environment.
Preventing warping in PLA is entirely possible, and in this article we’ll break down step-by-step the techniques and settings that really make a difference. From controlling temperature and humidity to optimizing part design and setting up the slicer for perfect adhesion, we’ll cover everything from how to control temperature and humidity to optimizing part design and setting up the slicer for perfect adhesion. With the right tips, you’re sure to achieve warp-free prints.
The warping is a phenomenon in 3D printing that manifests itself when the corners or edges of a part begin to lift off the printing surface during the printing process. This deformation not only affects the aesthetics of the part, but can also compromise its functionality and accuracy, usually resulting in a failed print. Generally, warping occurs due to uneven shrinkage of the filament as it cools, creating internal stresses in the part that cause some areas to lose adhesion to the base.
The first layer is the most important in 3D printing, since its correct adhesion depends on the stability and success of the rest of the printing process.
The impact of warping on print quality is evident from the moment the part begins to peel. By not staying in place, the part loses dimensional accuracy, which can make it unusable for precise assemblies. It often affects structural stability, especially in large parts or those where precision is critical, thus generating problems that affect the quality and durability of the final product.
Warping is largely explained by physical principles related to thermal stresses and material shrinkage. During printing, PLA is heated to its “decomposition” point (because PLA does not melt like most materials) to be extruded, and then cools as it comes into contact with the printing surface. This uneven cooling generates stresses that, if not properly controlled, end up causing deformations. Knowing these principles is essential to be able to apply effective preventive strategies, such as adjusting the temperature of the hot bed or controlling air currents in the printing environment.
| Factor | Description |
|---|---|
| Thermal Factors | The temperature of the hotend, hot bed and general environment directly affects the way the filament cools. Too rapid cooling, especially in the first layers, promotes warping. |
| Adhesion Factors | The printing surface and the adhesion methods used (adhesives, lacquers, specific surfaces) play a vital role in avoiding warping. If the base of the part is not adhered properly, warping is almost inevitable. |
| Environmental factors | Temperature variations in the printing environment and air currents are also a major risk. If the part is cooled inconsistently, some areas will have greater shrinkage than others, causing lifting. |
| Material Factors | Each filament has unique characteristics that affect its susceptibility to warping. In the case of PLA, its low printing temperature makes it slightly less prone to warping compared to other materials such as ABS, but it is still vulnerable under certain conditions. |
| Design Factors | The geometry and internal structure of the part also influence the propensity for warping. Designs with sharp corners or reduced contact areas tend to be more difficult to keep adhered to the print bed. In addition, those designs that consist of a larger first surface area tend to suffer from warping. |
| Configuration Factors | Parameter settings such as print speed, layer height and fill density can be both the cause of warping and their own solution. |
| Mechanical Factors | Bed leveling and printer calibration directly impact adhesion quality and thus the likelihood of warping. A poorly leveled or unbalanced bed can result in low adhesion dots. |
| Software Factors | Slicer software also offers tools to mitigate warping, such as the addition of brims, rafts and compensated shrinkage settings. Ignorance of these tools can lead to a more complex “solution”. |
PLA is one of the most popular materials in 3D printing, not only for its ease of use, but also for its unique properties that make it a versatile option for multiple applications. However, as with any material, it is necessary to know in depth its characteristics to get the maximum performance, especially if we want to avoid problems such as warping.
PLA, or polylactic acid, has a low “melt” temperature compared to other materials such as ABS or PETG, which reduces its propensity for warping. However, this advantage also means that it is more sensitive to temperature changes in the printing environment. PLA tends to solidify quickly, which, under adverse conditions, can create internal stresses and cause warping in larger parts or parts with reduced contact areas.
At Figutech, as a producer of premium PLA, our formulation is specially designed to improve the thermal stability of the filament and minimize the risk of deformation. Still, it is critical to use the right printing settings to take full advantage of these properties and achieve perfect prints. What do we mean by this? That if you really try, you can make even the best material on the market suffer warping. It’s a matter of physics.

PLA is a hygroscopic material, which means that it can absorb moisture from the environment. This is a critical factor, as PLA that has absorbed water tends to behave in an unstable manner during printing, generating bubbles and increasing the chances of warping and other defects. It is advisable to store PLA in a dry environment, preferably in airtight containers with desiccants, or in sealed bags that protect the filament from moisture.
As professionals in the filament industry, we at Figutech.com suggest keeping PLA in a relative humidity below 15%, ideally in a controlled environment. In this way, the filament will retain its original properties, providing a more accurate and deformation-free print.
To minimize the risk of warping, it is essential to set the hotend temperature correctly. The ideal extrusion range for high quality PLA is between 195 °C and 220 °C, although the exact setting depends on individual printer specifications and environmental conditions. Many people try to print at the lowest possible extrusion temperature, it doesn’t make sense! If you print at a temperature too close to the minimum temperature allowed by the material and the precision of your machine is not “Swiss” you may cause a jam. Calibrate your machine starting from an intermediate point, that’s why we recommend temperatures from 195 ºC instead of 190 ºC, as most of them.
Individual skill and mastery of printing techniques are a large percentage of successful prints, but filament quality is critical for trouble-free printing. Poor quality PLA can exhibit diameter variations, impurities and unpredictable behavior during printing. At Figutech.comeach batch of filament undergoes rigorous testing to ensure consistent diameter and composition, providing stable extrusion and reduced warping. By opting for high-quality filaments, such as those produced by Figutech, makers can significantly reduce the risk of warping and other defects.
Environmental conditions during the printing process directly influence the propensity of PLA to experience warping. A controlled environment must be maintained to ensure that the filament cools evenly and that there are no thermal stresses that cause warping.
A stable temperature environment contributes to uniform and distortion-free printing. For PLA, an ideal ambient temperature is between 20 °C and 25 °C. When printing in a very cold room or with significant variations, PLA can suffer from sudden cooling, especially in the first layers, which increases the risk of warping. To optimize results, it is advisable to control the temperature of the printing space, especially in winter seasons or in ventilated environments.
Air currents are the enemy of stable printing, since they cool certain areas of the part in a non-uniform way, favoring the appearance of thermal stresses. Minimizing or eliminating air currents in the printing area is essential, especially when working with PLA, which is a material sensitive to sudden temperature changes. A practical solution is to locate the printer in a draft-free area or to use a draft shield around the printer to mitigate this effect.

Although PLA does not necessarily require a closed chamber to print optimally, using one can be beneficial in certain situations, such as in cold or persistent drafty environments. Enclosed chambers help maintain a stable temperature around the part and reduce the possibility of warping in the first few layers. If you have a printer with a closed chamber or can build a temporary overlay, this can significantly reduce the risk of warping, especially on larger prints.
Like storage, controlling humidity in the printing environment is crucial for PLA. A high humidity environment can cause the filament to absorb “water”, affecting its behavior in the extrusion process. Maintaining a low relative humidity(ideally below 40%) in the printing area contributes to better print quality and dimensional stability of the part. We always recommend working in low humidity conditions to avoid complications and to obtain more accurate and durable parts.
The printing surface and its proper preparation are essential to achieve good adhesion of the first layer, which is the starting point to avoid problems such as warping. There are different types of surfaces and methods to improve adhesion.
The choice of printing surface directly affects the stability of the first layer. The most common surfaces used for PLA and their characteristics:

Each surface has its advantages and disadvantages, and your choice will depend on the specific results you want to achieve.
Keeping the printing surface in good condition is essential for good adhesion. Some preparation and maintenance tips are:
If you are looking for a really effective solution, using adhesive products may be the best option to solve warping. Some of the products we recommend are:
These adhesion enhancers are particularly useful for large prints or for parts with complex geometries that tend to deform at the edges. We always recommend experimenting with these products to achieve the best possible adhesion for each project.
The heated bed is a key tool to prevent warping in PLA, as by maintaining a proper temperature at the base, sudden temperature changes that cause stresses in the first layer are avoided. For Figutech.com‘s high quality PLA, we recommend keeping the heated bed between 50 °C and 60 °C. This range allows for firm adhesion without risk of deformation due to excessive heat.
In addition, once the printing process is finished, it is recommended to wait for the bed to cool down so that the part can detach naturally, avoiding tensions that could damage the part or the printing surface.
The way we design a 3D printed part has a direct impact on its behavior during the manufacturing process. There are certain design principles that help you reduce internal stresses and improve the adhesion of the first layer, thus reducing the likelihood of warping.

The geometrical design of a part directly influences the stress distribution during printing. Parts with sharp corners and small contact areas are usually more prone to warping, as the bond strength in these areas is lower. To minimize warping, it is recommended:
Areas that concentrate too much stress may experience deformation, especially during the cooling stage. Some techniques to better distribute stresses are:
Adjustments to the corners and curvatures of the part help reduce the risk of lifting at the edges. Some specific recommendations include:
The orientation of the part on the print bed is a decisive factor in the final quality and the possibility of warping. By strategically orienting the model, it is possible to reduce the risk of warping. Consider the following recommendations:
The internal parameters of the part, such as infill and wall thickness, also play an important role in the stability of the model during printing. Some recommended settings are:
There is no secret formula for the perfect 3D printing setup for ALL your projects. But there is a range and some practices that come close to the “perfect” setup. However, the settings vary considerably depending on your printer. It is important to adapt these settings to your specific equipment and rely on sources using the same printer model, as what works for one machine may not be optimal for another.

The first step in using Cura is to configure the “visibility of settings”. By default, the interface shows limited options, as it is set to “basic” mode to make it easy to use for beginners. To access more options and improve control of your prints, select the “Advanced” setting.

1. Shrinkage Configuration
2. Printing speed
3. Ironing (Surface Smoothing) Configuration

To improve the quality of the top layer on PLA parts and reduce surface imperfections:
4. Fuzzy Skin (Surface Texture)
The Fuzzy Skin option in Cura can add texture to the surface of the part, useful in aesthetic applications. However, to avoid warping on parts where adhesion is critical, avoid using this option on the first few layers of print.
5. Support Configuration
To improve part stability and avoid warping in models with protruding areas:
The settings in this Slicer are very similar to “Cura” but PrusaSlicer has some different options. Make sure to activate the following:
These are the most important parameters to improve adhesion and prevent warping in PLA. There are different adhesion techniques that can be useful:

The temperature of the hot bed and hotend are really important factors to avoid warping in PLA. Recommendations for high quality PLA filaments, such as those from Figutech, are:
Progressive cooling helps to avoid deformation of the PLA. Set the cooling fan to 10-20% during the first layer and then gradually increase to 100% on the top layers. This setting allows the first layers to adhere firmly before full cooling is applied.
The retraction setting prevents stringing and improves PLA print quality:
Reducing the speed of the outer perimeters to 20-30 mm/s contributes to better adhesion quality and finishing accuracy.
Raise the temperature in small increments (5°C) to find the optimum adhesion temperature without creating an “elephant foot”. Increase the cross section of the printed filament:

Adjust the layer height (25-75% of the nozzle diameter) and line width (60-200% of the nozzle diameter). A larger line width, about 150-200%, can help increase the pressure of the first layer on the print bed, which improves adhesion and reduces the risk of warping.
The 3D printer firmware is responsible for the mechanics and precision of the print. The automatic leveling and compensation commands help to improve the adhesion and stability of the first layer. Here are some examples of positive practices:
Marlin Firmware:
Creality firmware:
Keeping the printer in good condition is key to ensuring consistent print quality. Some essential aspects of preventive maintenance include:
Despite preparation, common problems can arise when printing with PLA. Here are some typical problems related to warping and their solutions:
These maintenance and quality control practices not only help prevent warping in PLA, but also contribute to parts with superior dimensional accuracy and stability, maximizing the quality of each print.
Without testing, you are not going anywhere… Usually the testing phase is needed to adjust the printing parameters and validate that each configuration is fine-tuned to avoid all kinds of problems such as warping. As all makers know, the trial-and-error method is widely used in 3D printing.
A stable and well bonded first layer is key to a good print. First layer tests allow to verify the adhesion before starting complex impressions. Some recommended techniques are:
The best temperature setting for high quality PLA is usually between 200 °C and 220 °C in the hotend and between 50 °C and 60 °C in the hotbed.
For large parts, using a 5-10 line brim increases the contact area at the base, helping to prevent lifting at corners. A raft is also effective, although it consumes more material and time. These methods are highly recommended for stabilizing large models.
It is not essential, as PLA is not as sensitive as other materials, but in environments with temperature fluctuations or drafts, a closed chamber can be beneficial. This helps maintain a constant temperature and reduces the risk of uneven cooling in the first layer.
A well-bonded first coat will have even lines, with no gaps or build-up. You can perform a first coat test with a grid pattern to observe adhesion and make leveling and coat height adjustments as needed.
Yes, in extreme cases, PLA can warp if exposed to direct sunlight for extended periods of time. Although it has good thermal stability under printing conditions, exposure to the heat of the sun can cause PLA to soften and lose its shape, especially if temperatures exceed 50 °C.
Smooth Surfaces in 3D Printing | Seams Ironing
Surface quality is the first impression of a 3D part. In Bambu Studio you can gain “professional face” with two
Volumetric Speed Test | Increase 3D Printing Speed
Want to print faster without losing quality? The key is to know the volumetric speed limit of your 3D printer

OrcaSlicer Tolerance Test: Complete 3D Printing Guide
OrcaSlicer’s tolerance test solves a common problem in 3D printing: parts that do not fit correctly when assembled. This simple
3D Printing Shrinkage Test: Quick Guide 2025
Reducing stringing in 3D printing is not a matter of luck, but of good setup. Learn how to do a

Flow Test in 3D Printing: Quick Solution
Filament flow calibration is one of the most important settings in 3D printing. This calibration is done by one or
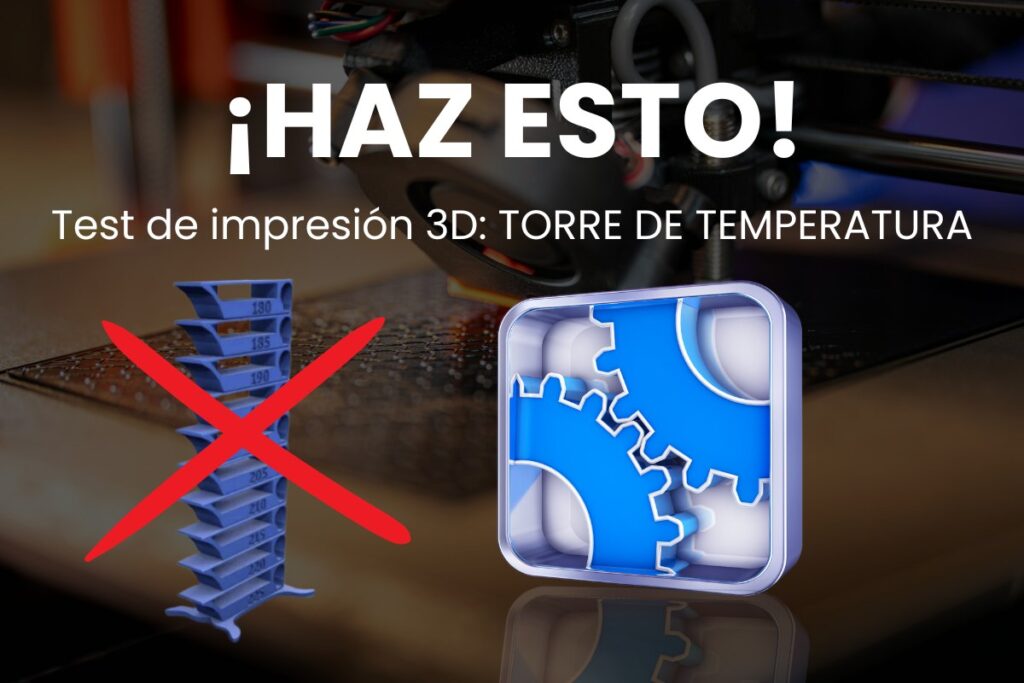
PLA Temperature Tower for 3D Printing: Guide 2025
Why not just follow the manufacturer’s guide, if only! Filament specifications are a good starting point, if you 3D print
We promise to send you only what interests you: practical advice, special discounts and access to free samples of our filaments. No spam, only benefits.